The 6-Phase Vehicle Wrap SOP for Zero-Fail Adhesion
Why a strict SOP eliminates warranty claims
Most wrap failures are process failures, not material failures. A disciplined, repeatable six-phase protocol standardizes shop quality and removes the variables that cause edge lift, bridging and premature peeling. The six phases run in order: environment, chemical prep, zero-impact cut, thermal reset, stabilization, and sign-off. Follow every phase and the objective — zero-fail adhesion — stops being a slogan and becomes a measurable outcome. Our wrap engineering masterclass covers the full physics behind each step.
Phase 01–02: stabilize the environment and chemistry
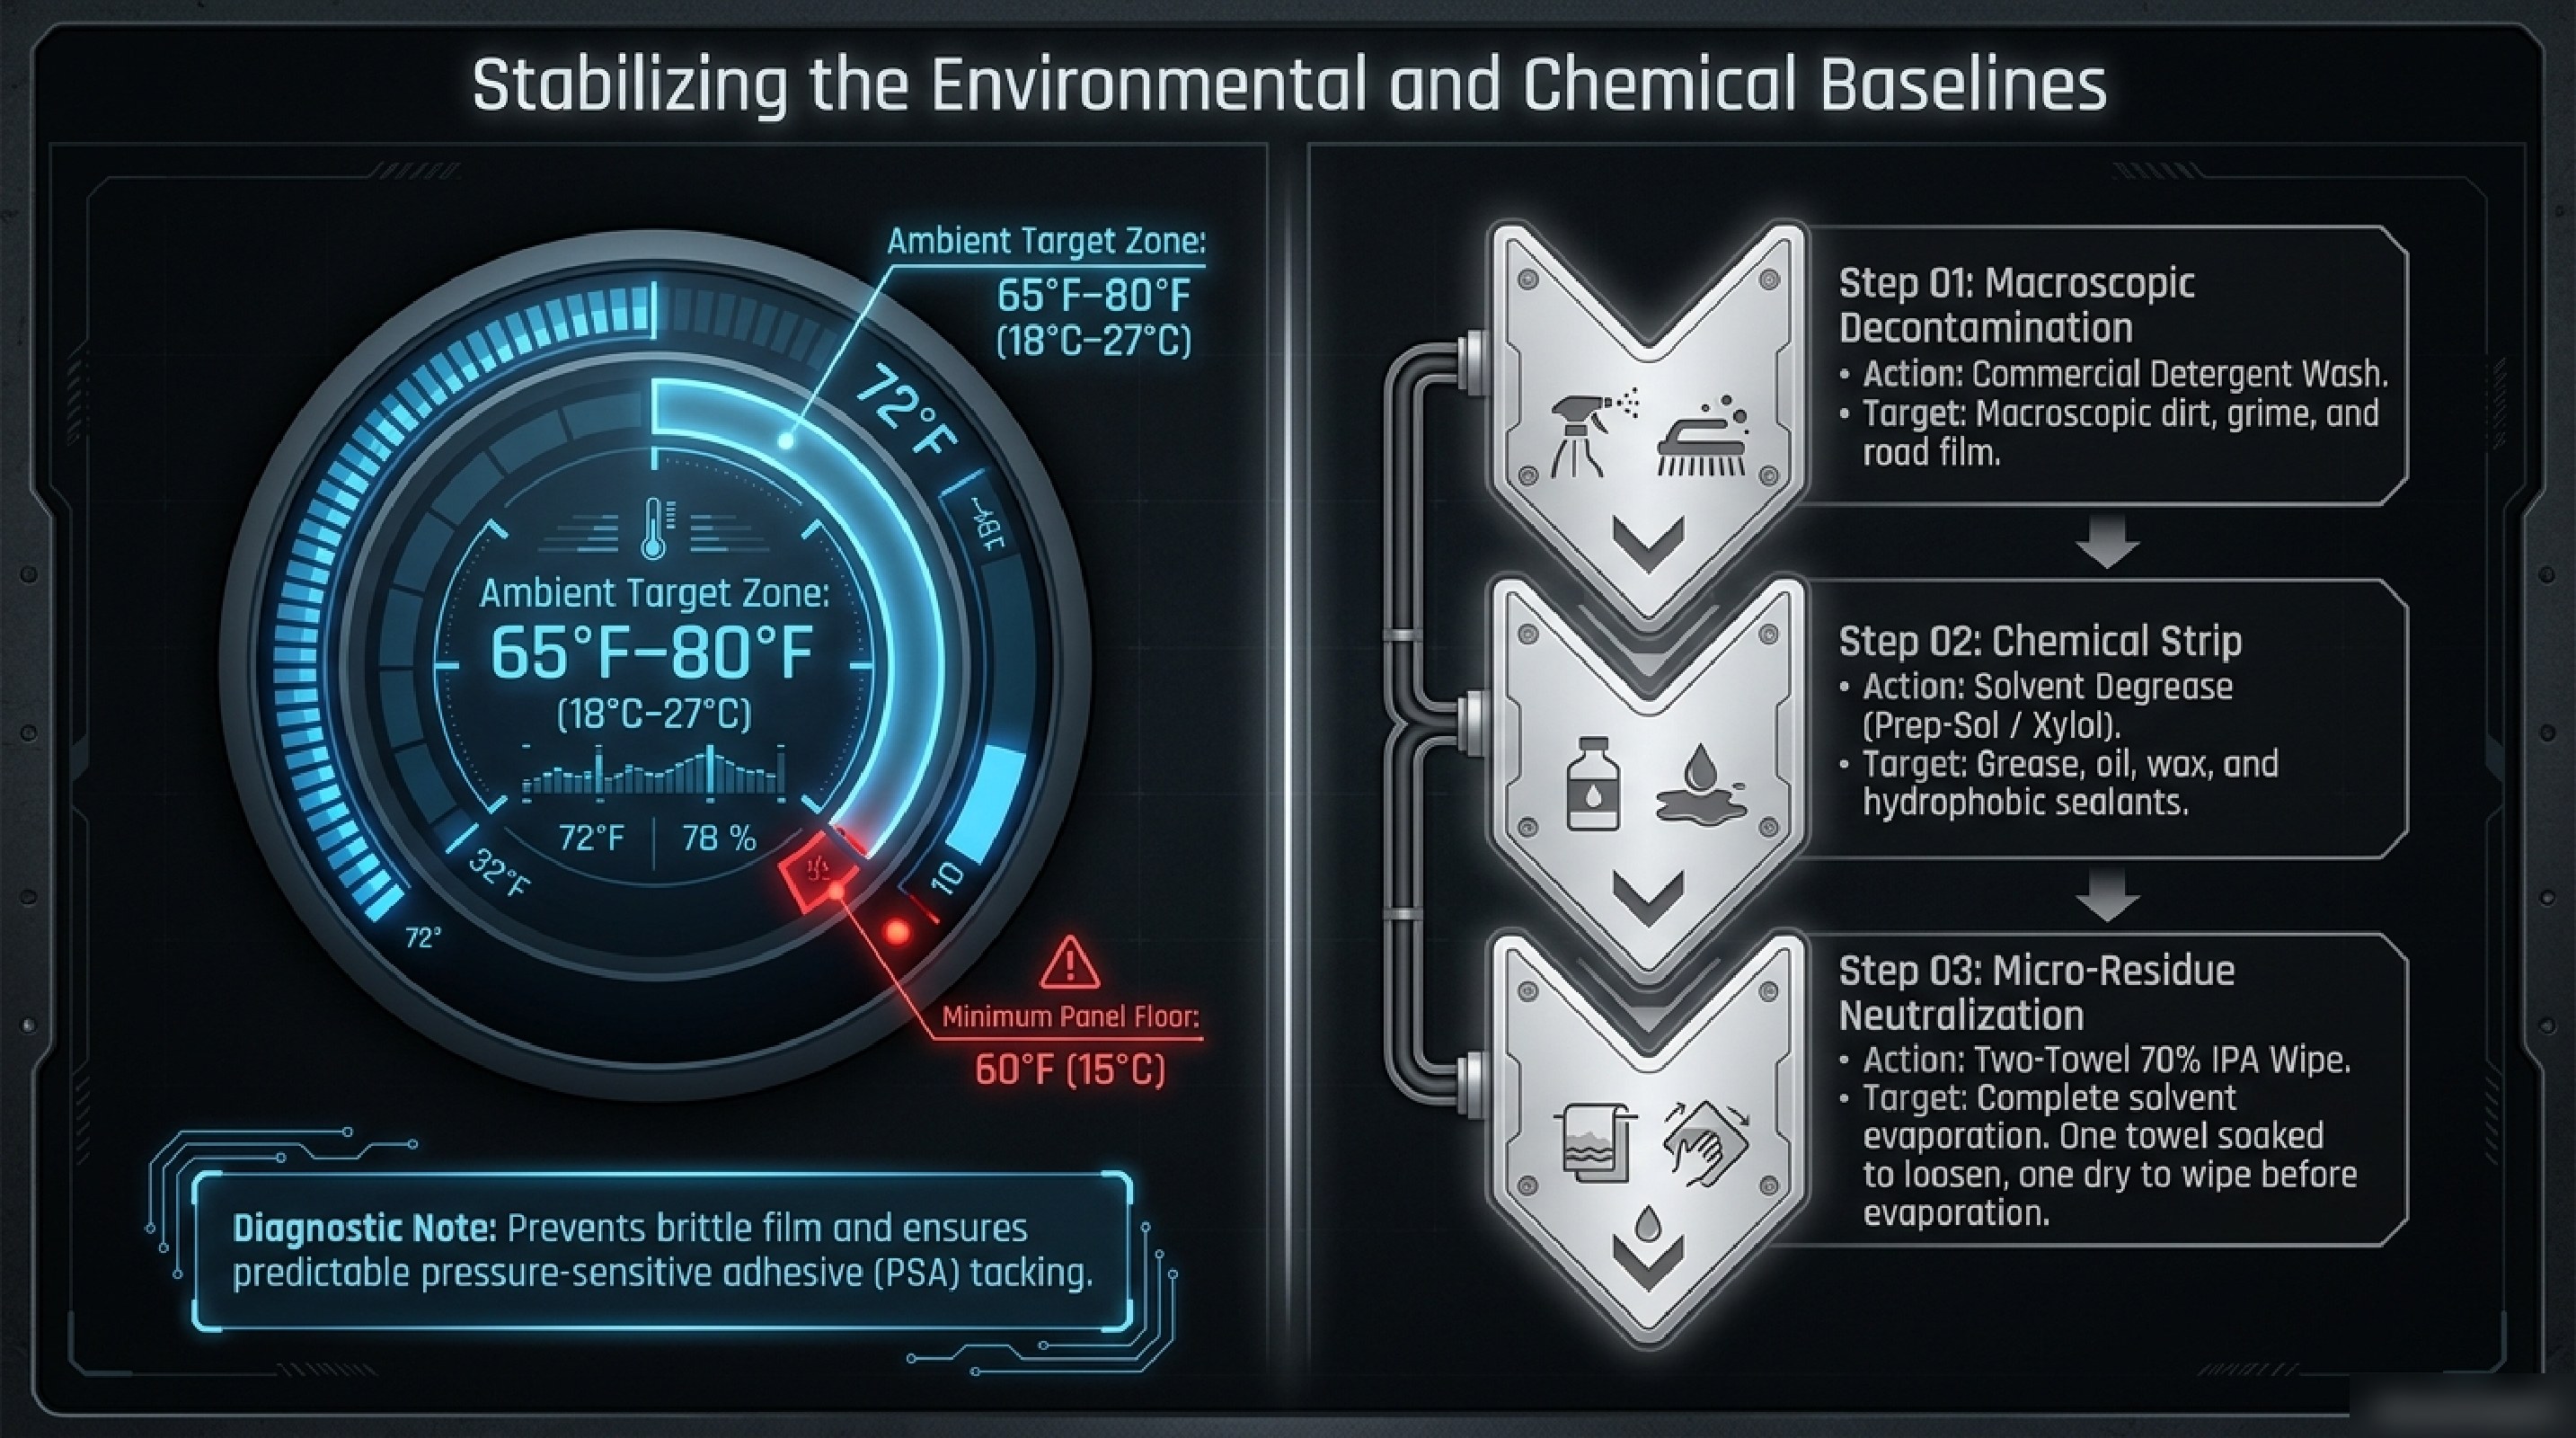
Adhesion is decided before the film goes on, and it starts with temperature. The ambient target zone is 65°F–80°F (18°C–27°C), with a minimum panel surface floor of 60°F (15°C) so the pressure-sensitive adhesive tacks predictably. Below that floor the film turns brittle; above it the adhesive pre-tacks too aggressively.
Then comes a three-step decontamination. Step 01 is a macroscopic detergent wash to remove dirt, grime and road film. Step 02 is a solvent degrease with Prep-Sol or Xylol to strip grease, oil, wax and hydrophobic sealants. Step 03 is a two-towel 70% IPA wipe — one soaked towel to loosen residue, one dry towel to wipe it off before the solvent evaporates — so dissolved oils leave the panel instead of re-settling.
Phase 03: zero-impact cuts with filament tooling
Utility blades never touch OEM clear coat. The mandated protocol uses knifeless filament tape, which cuts the vinyl from beneath with zero blade contact. Three tapes cover the field: Bridge Line (12.7 mm / 0.5 in) spans wide panel gaps for simultaneous parallel shear cuts, Finish Line (3.5 mm) handles standard edges and panel returns, and Design Line carries freeform artwork and tight radii on ultra-pliable carrier tape. Read our knifeless trimming guide for the full technique.
Phase 04: thermal reset — measure the film, not the gun
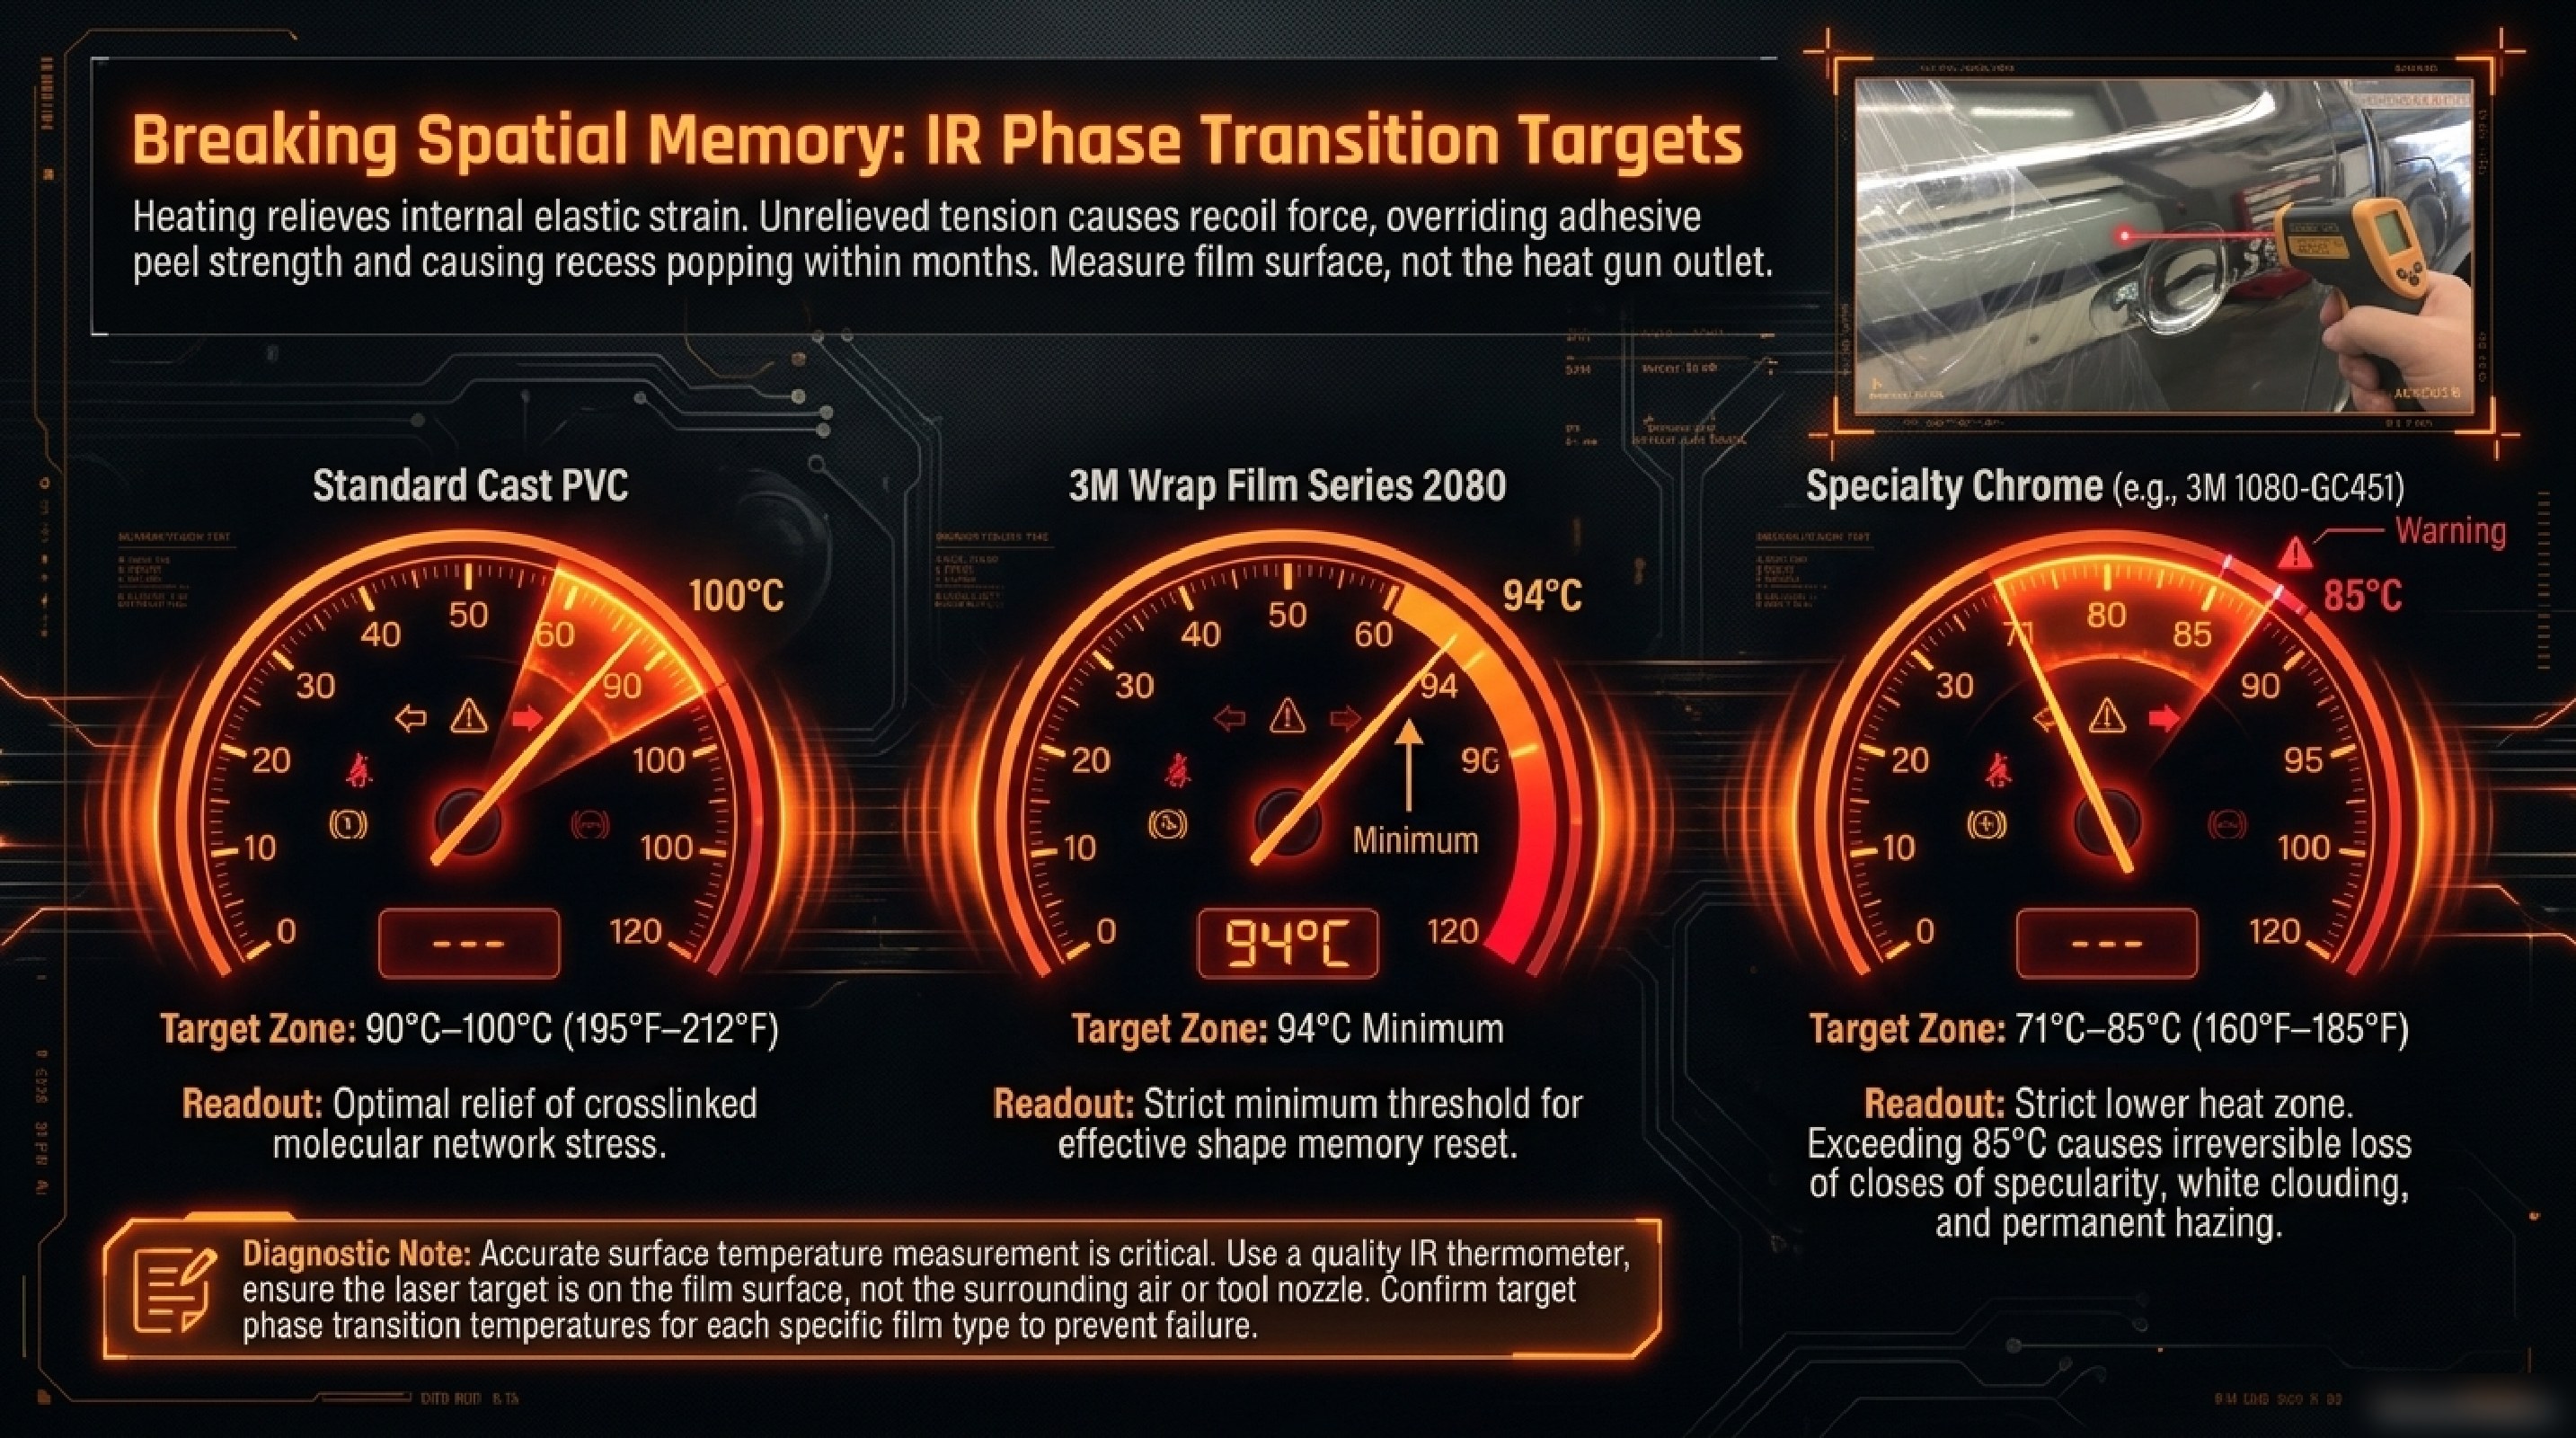
Post-heating relieves internal elastic strain. Unrelieved tension creates recoil force that overrides adhesive peel strength and causes recesses to pop out within months. The targets are film-specific: standard cast PVC resets at 90°C–100°C (195°F–212°F), 3M 2080 needs a strict 94°C minimum, and specialty chrome must stay within 71°C–85°C (160°F–185°F) — exceeding 85°C causes irreversible specularity loss, white clouding and permanent hazing.
Measure the film surface with a quality IR thermometer, never the heat gun outlet. Keep the laser target on the film, not the surrounding air or tool nozzle, and confirm the correct phase-transition temperature for each film type. Read the post-heat science.
Phase 05: adhesive wetting and stabilization
The bond is mechanical but shallow at installation. Pressure-sensitive acrylic adhesive flows into the microscopic surface texture over time and temperature — a process called wetting. The activation timeline runs T-zero (installation complete, initial tack achieved), T+12 hours (minimum dwell — do not release the vehicle), and T+24 hours (functional bond reached, viscoelastic flow complete, vehicle cleared for service).
During that window the vehicle stays in a locked, climate-controlled zone at 65°F–80°F. Premature exposure to thermal cycling, moisture or highway speeds interrupts viscoelastic flow and causes edge lift and bridging.
The master application matrix
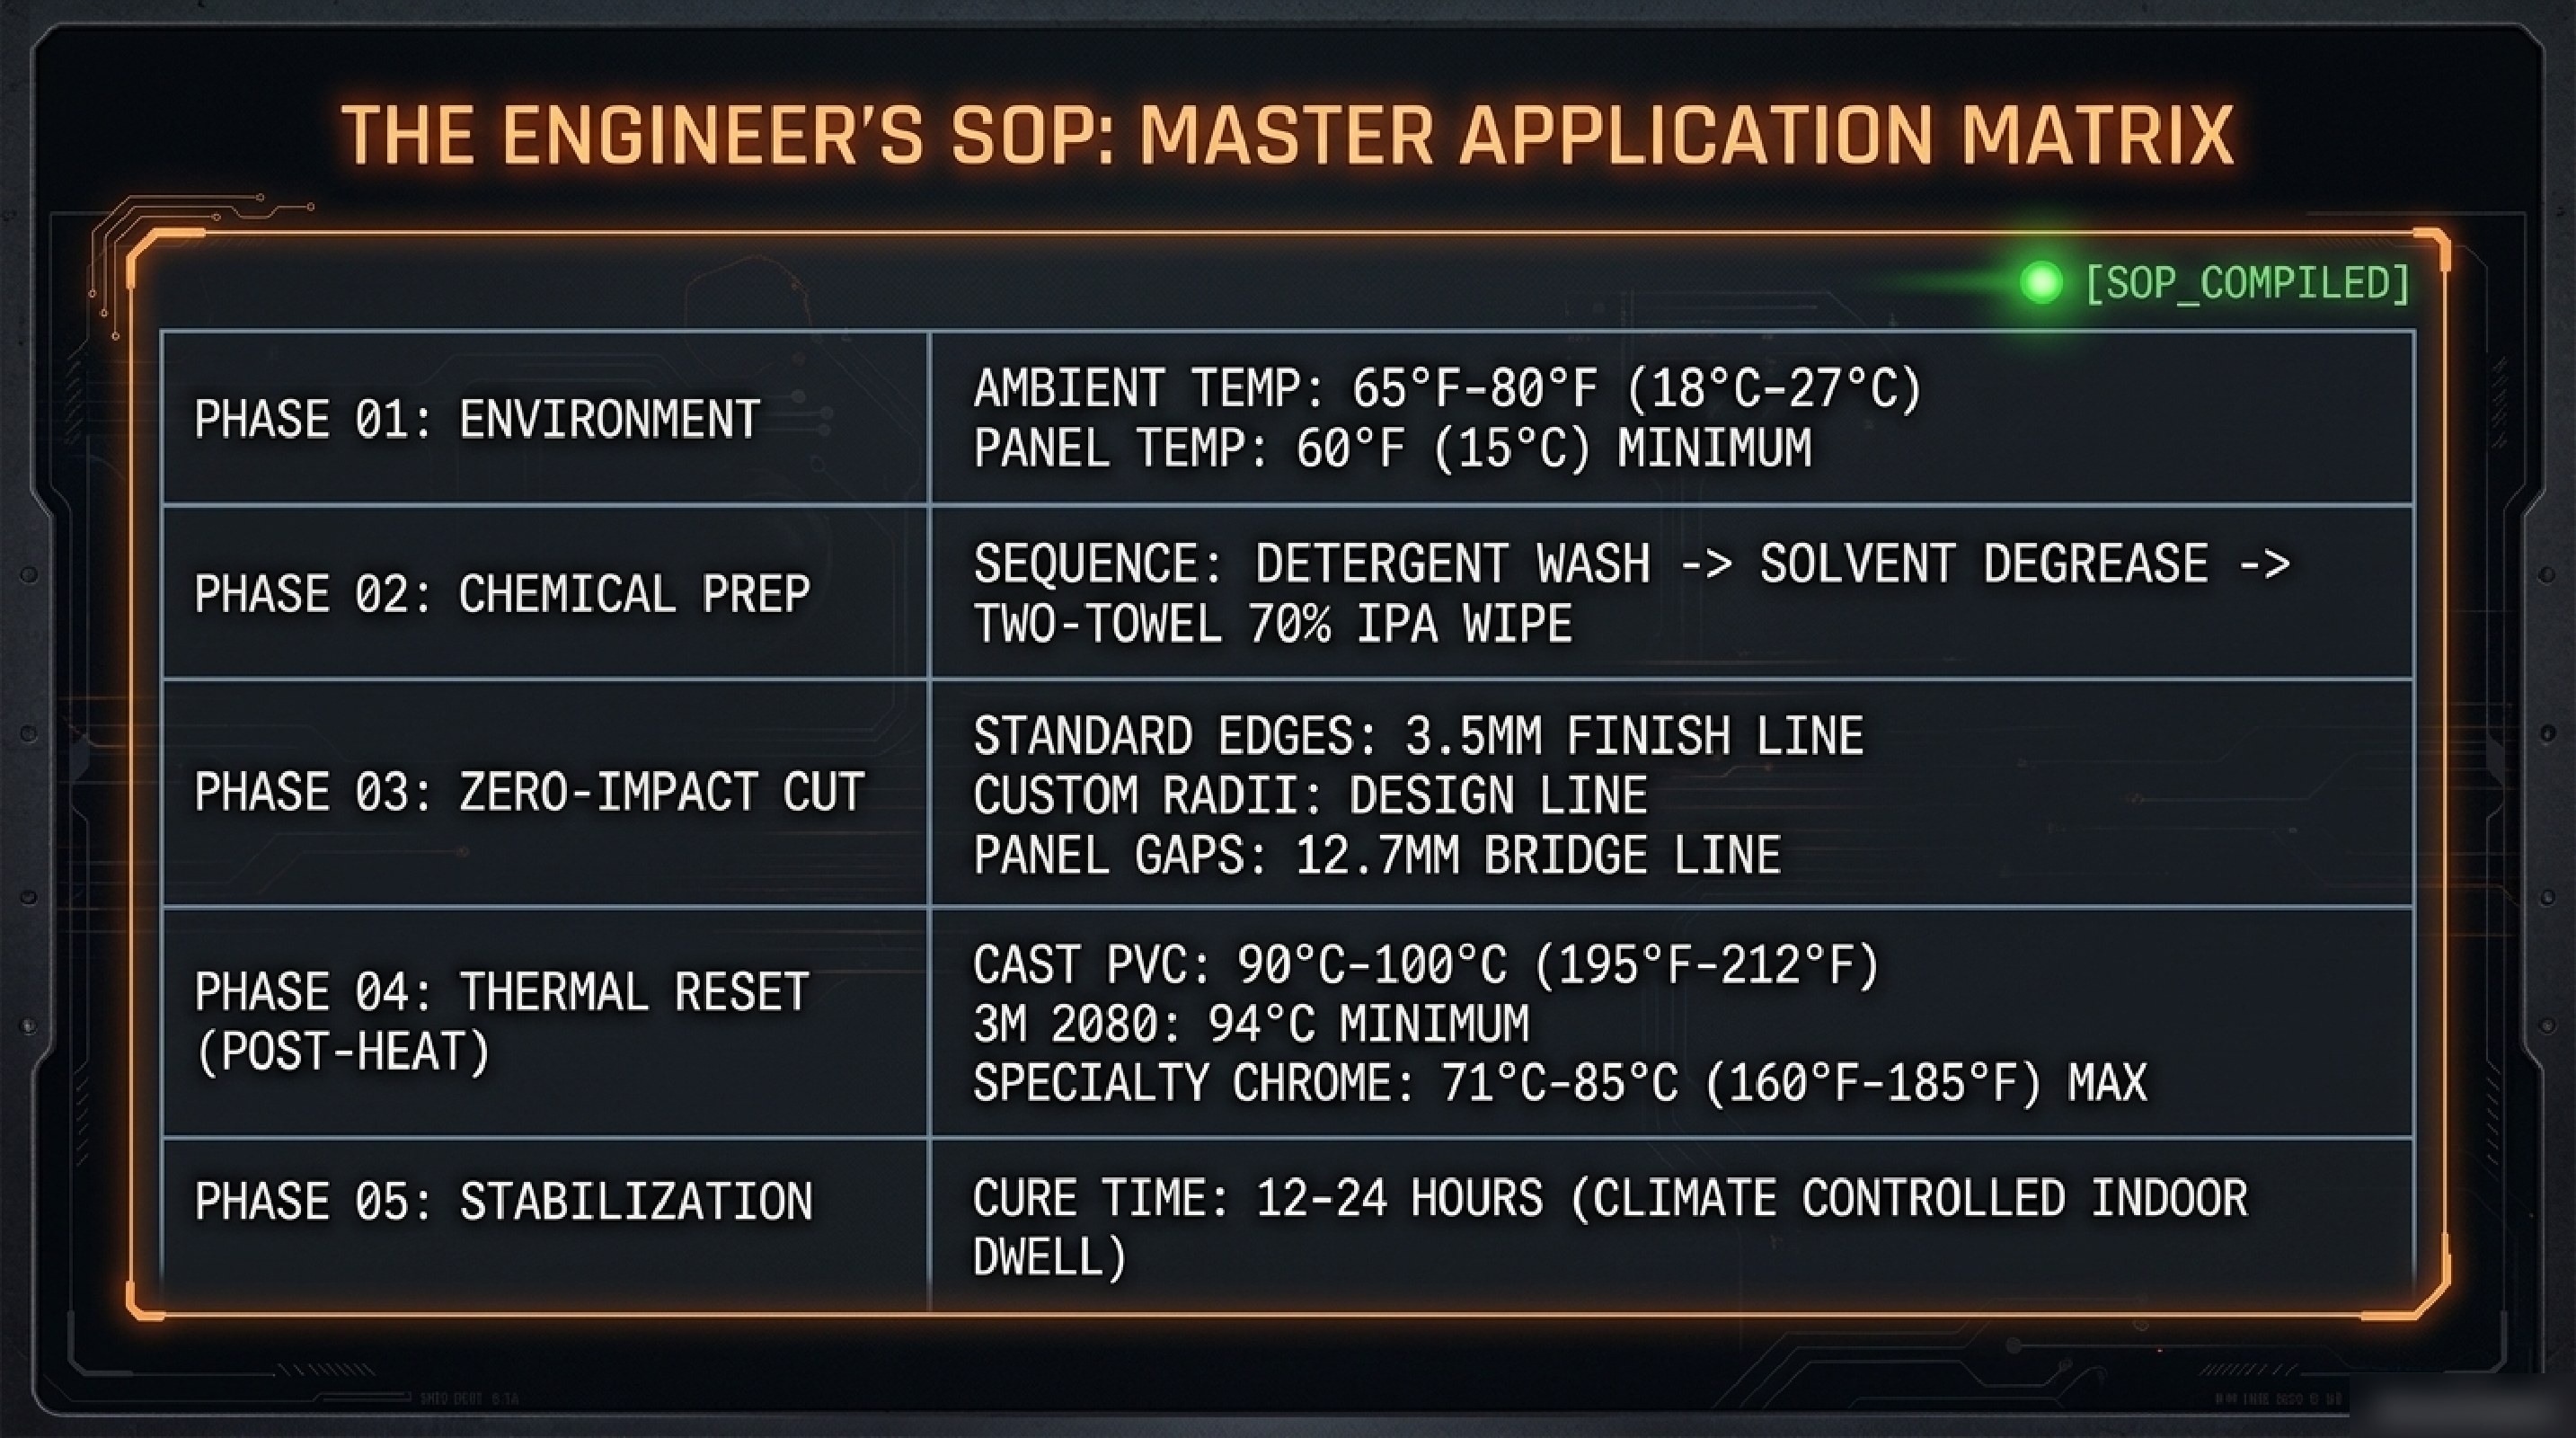
Compiled into one reference: ambient 65°F–80°F with a 60°F panel minimum; detergent wash, then solvent degrease, then two-towel 70% IPA wipe; 3.5 mm finish lines, design lines for custom radii and 12.7 mm bridge lines for panel gaps; post-heat at 90°C–100°C for cast PVC, 94°C minimum for 3M 2080, and 71°C–85°C maximum for chrome; and a 12–24 hour climate-controlled dwell before the vehicle sees the road. Pin this matrix in the bay and the warranty claims stop.
Ready to wrap?
Get a free, no-obligation quote for your vehicle — color change, fleet graphics or paint protection.